This is one of those crafts that I’ve been making almost since as long as I can remember! I used to have these sparkly, colourful candle holders all around my room! I’d spend days crafting with my mom, and have so much fun coming up with different patterns, designs, and ways of using glitter! ???? These candle holders are an easy and fun DIY project that add that special little hand-crafted touch to your home. The ones I made recently are more along the lines of my present-day home decor, but as you can see, these ones below (that I made as a kid) used to fit right in with my hot pink room!
I don’t know about you, but I love candles! I have at least a few candles in every room of my apartment, and on almost every surface. They create a lovely ambiance, and are perfect decor items for your home! So when I can mix two of my favourite things – home decor and DIY projects – I’m a happy camper!
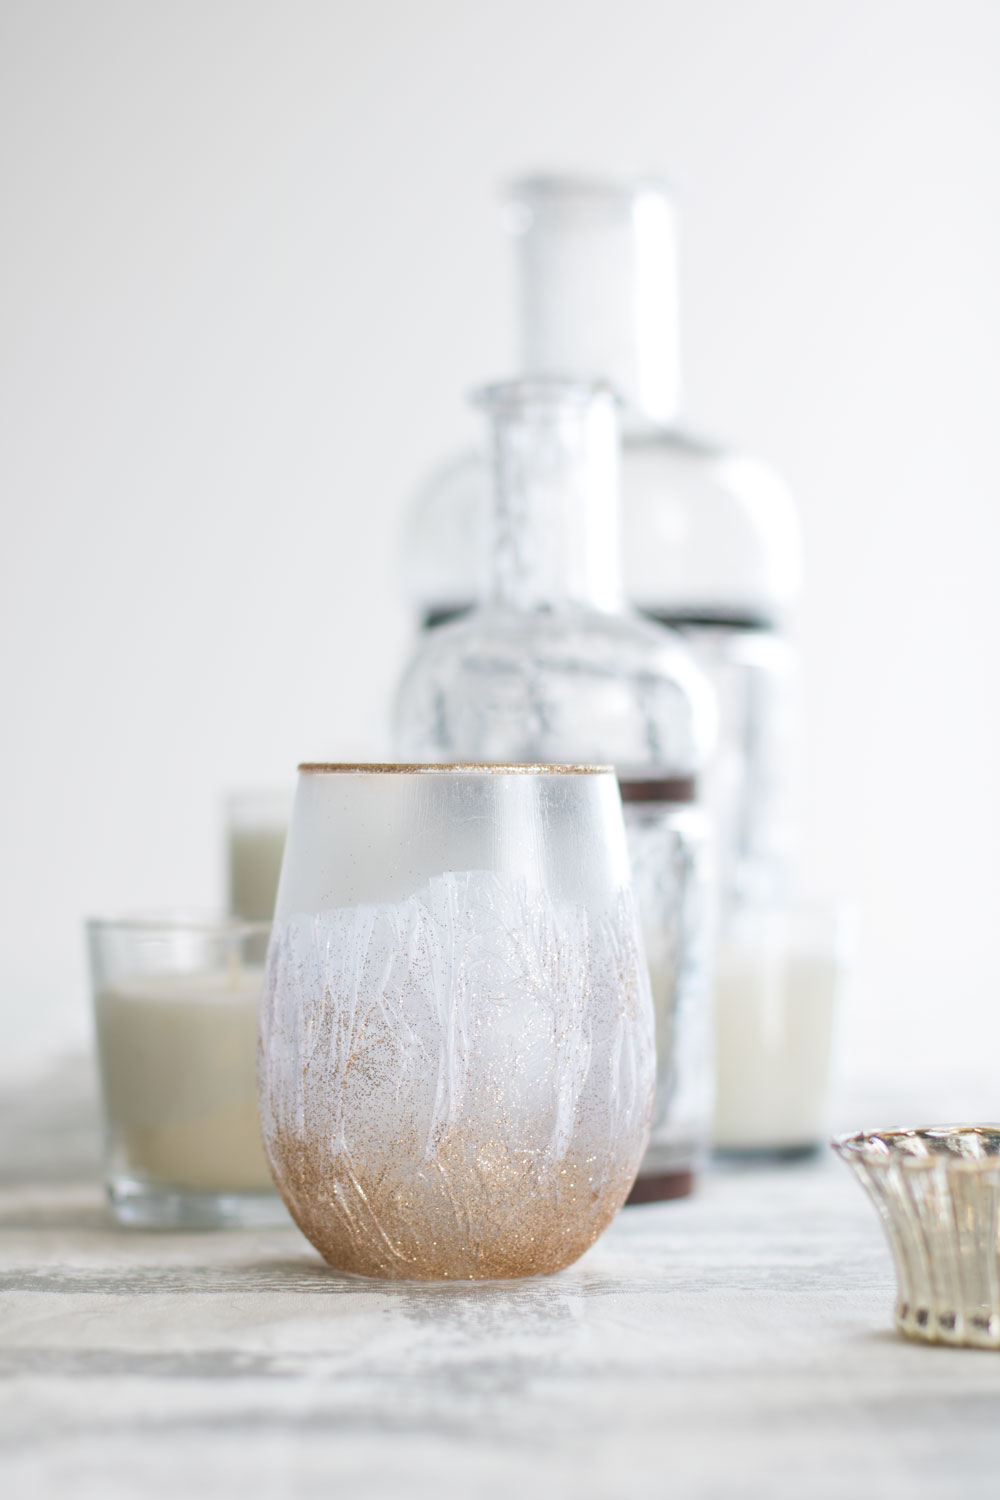
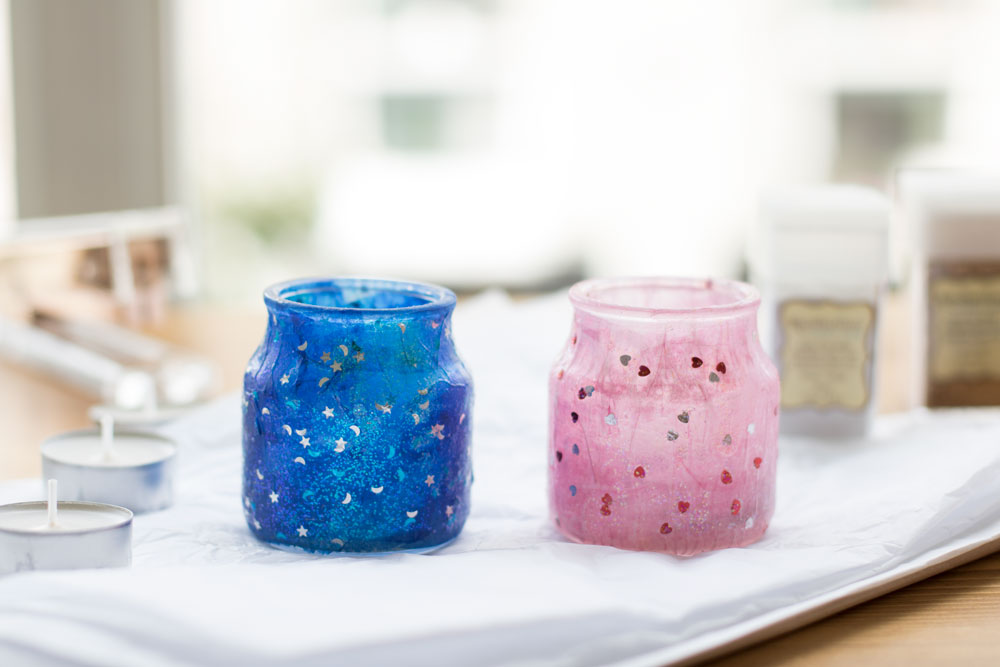
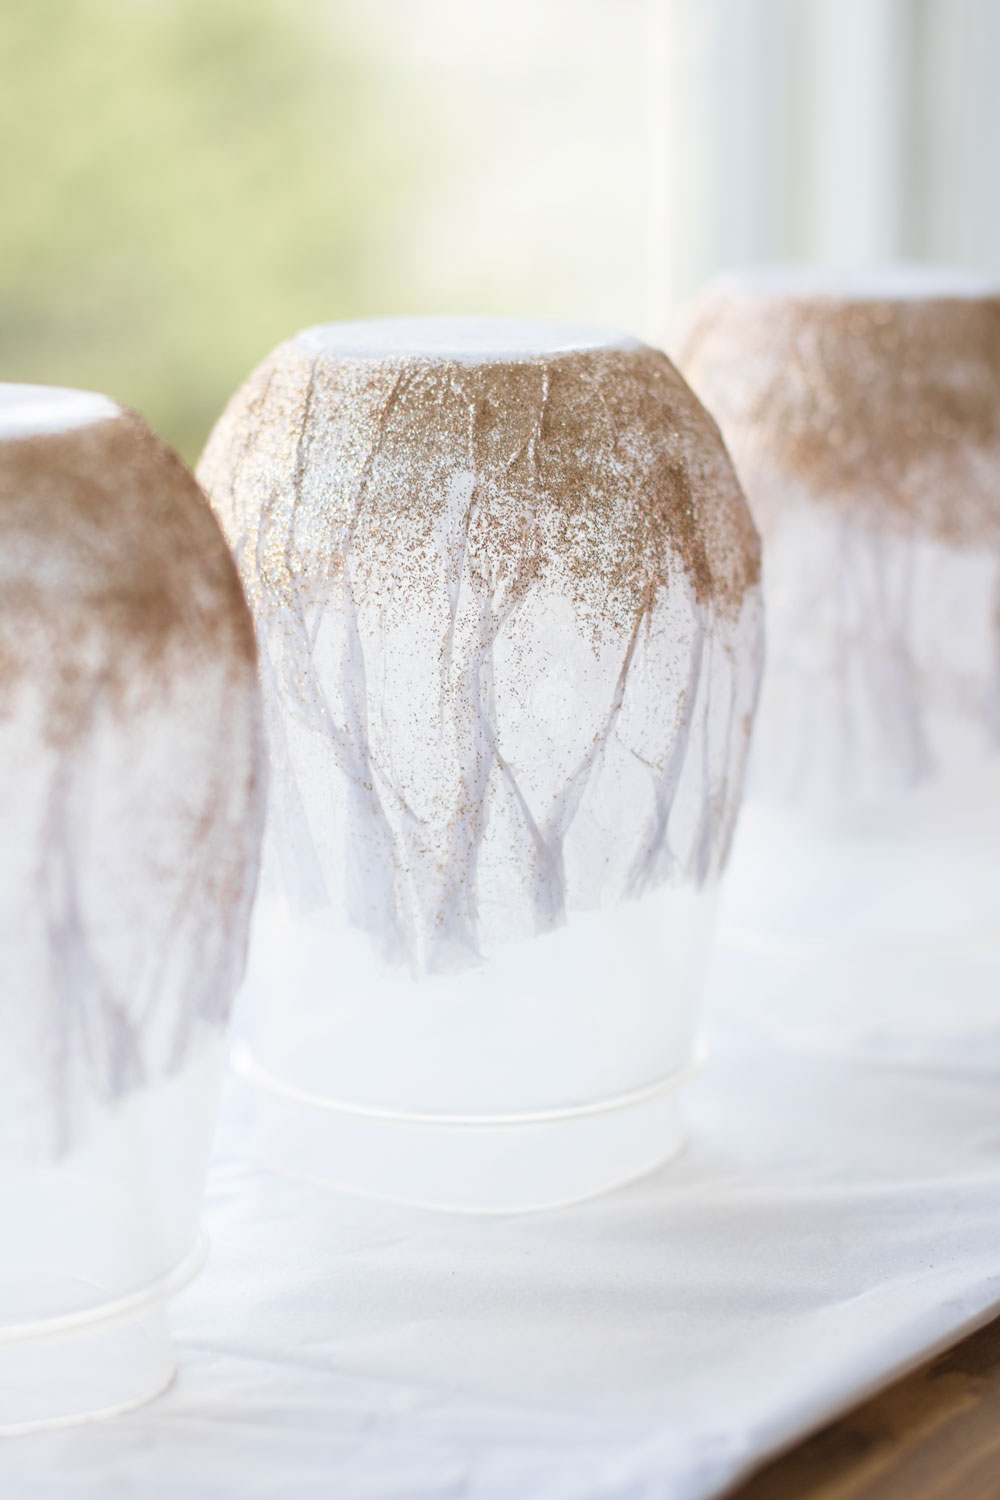
The possibilities for these candle holders are truly infinite! You can use any colour tissue paper, play around with patters, types of glitter, different glass jars – you name it! As with most of my DIY projects, the idea is to have fun with it! Think of what would go well in the space that you’re working with, and go from there. For me, I wanted to create a centrepiece for my dining room table, so kept it simple with white tissue paper and gold glitter to add a little sparkle.
Clearly I seem to really like tissue paper DIY projects, as one of my other recent DIY’s were these tissue paper flowers! It’s such a fun material to work with though, and I always have an overflowing box filled with tissue paper! If you’re like me and you save the paper from your shopping trips, gifts received – it adds up quickly!
Time to jump into some crafting! All in all, the project will probably take you a few hours, and it can vary quite a bit depending on your own crafting style and how many candle holders you’re making. I gave myself a Sunday afternoon to make these, and just enjoyed sitting at my desk, crafting away!
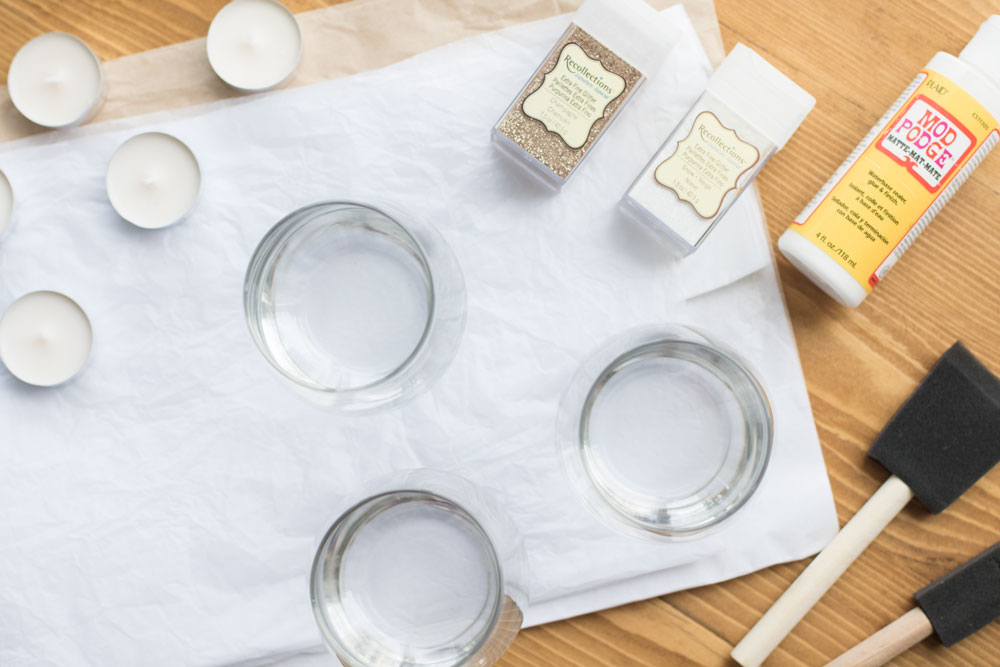
To make your own tissue paper & glitter candle holders, you’ll need the following materials:
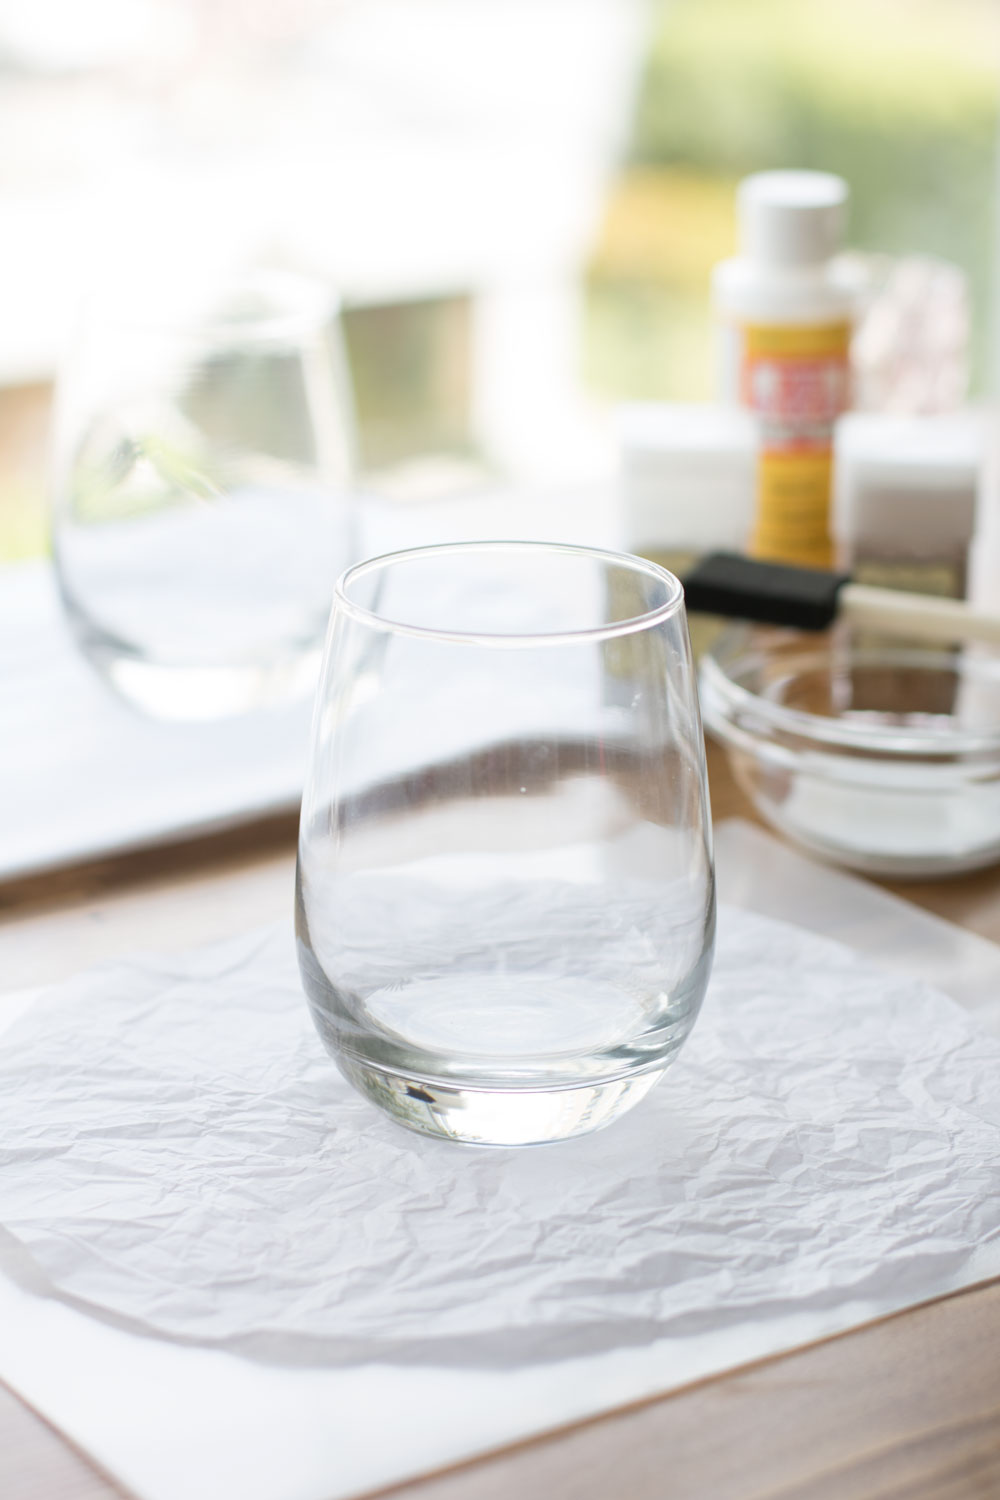
- Glass Jars or Votives
- Tissue Paper
- Mod Podge (both liquid and spray)
- Glitter
- Sponge Brush
1. Gather your Materials & Prep
I found my glass jars (which are actually stemless wine glasses) at Michaels, but you can get them anywhere! The dollar-store or Homesense have them – and I think I used to even use little glass yogurt containers. If your glass jars are visibly dirty, give them a light wash and/or take off the price stickers with warm, soapy water.
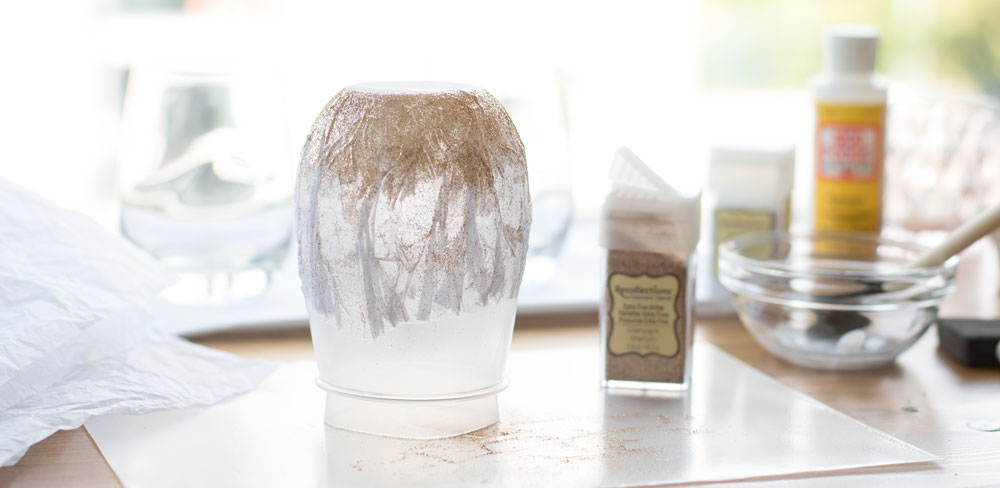
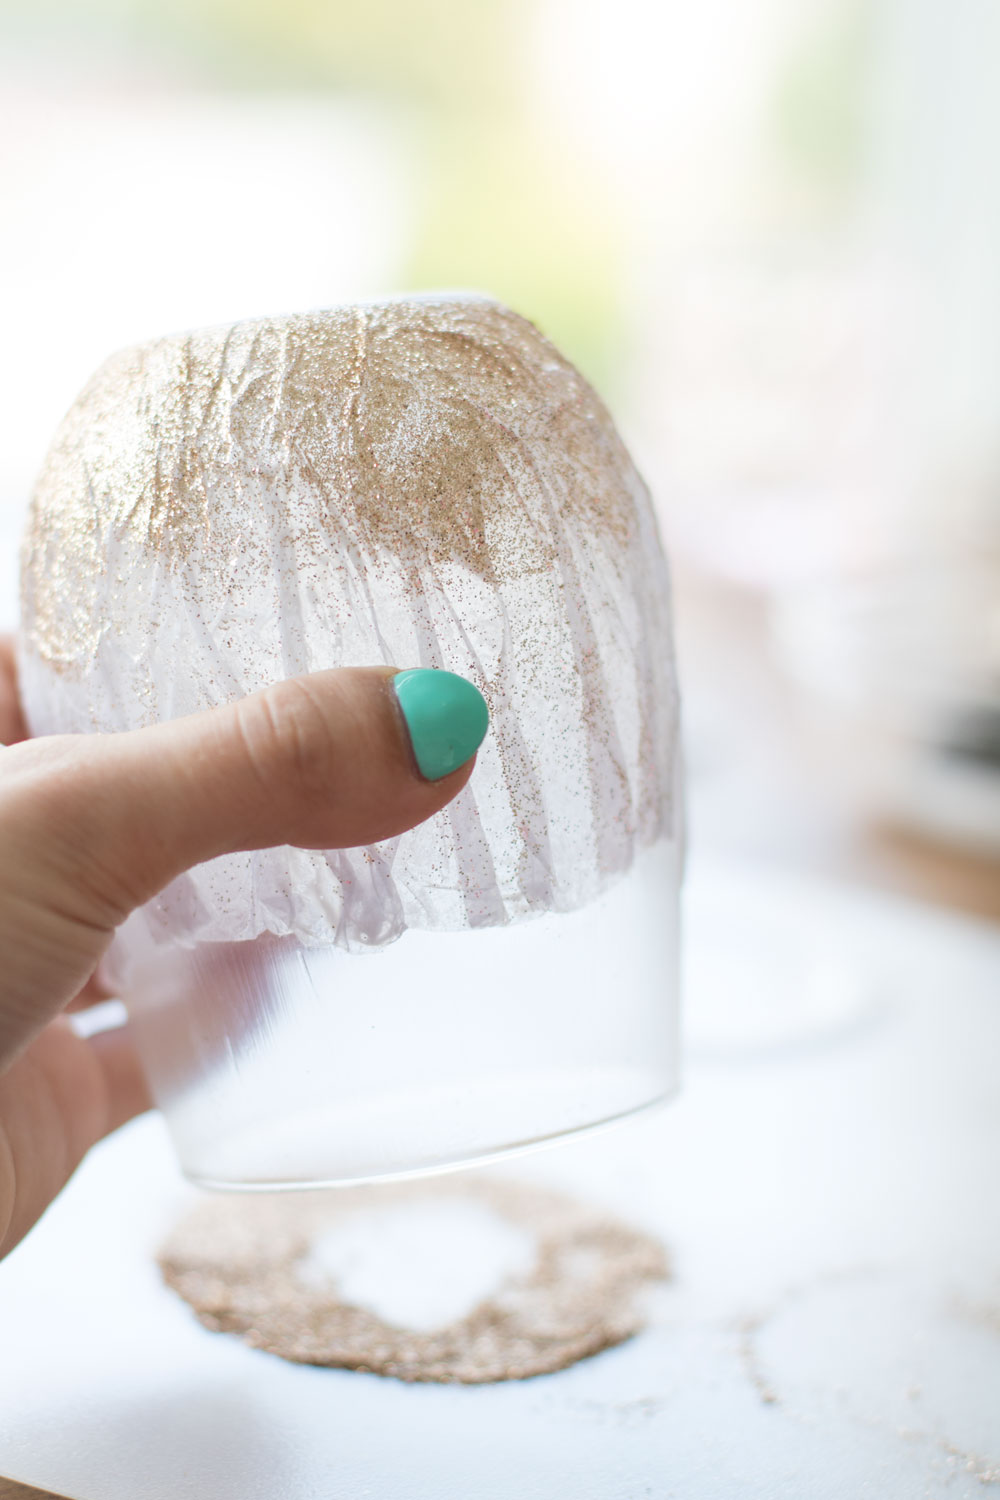
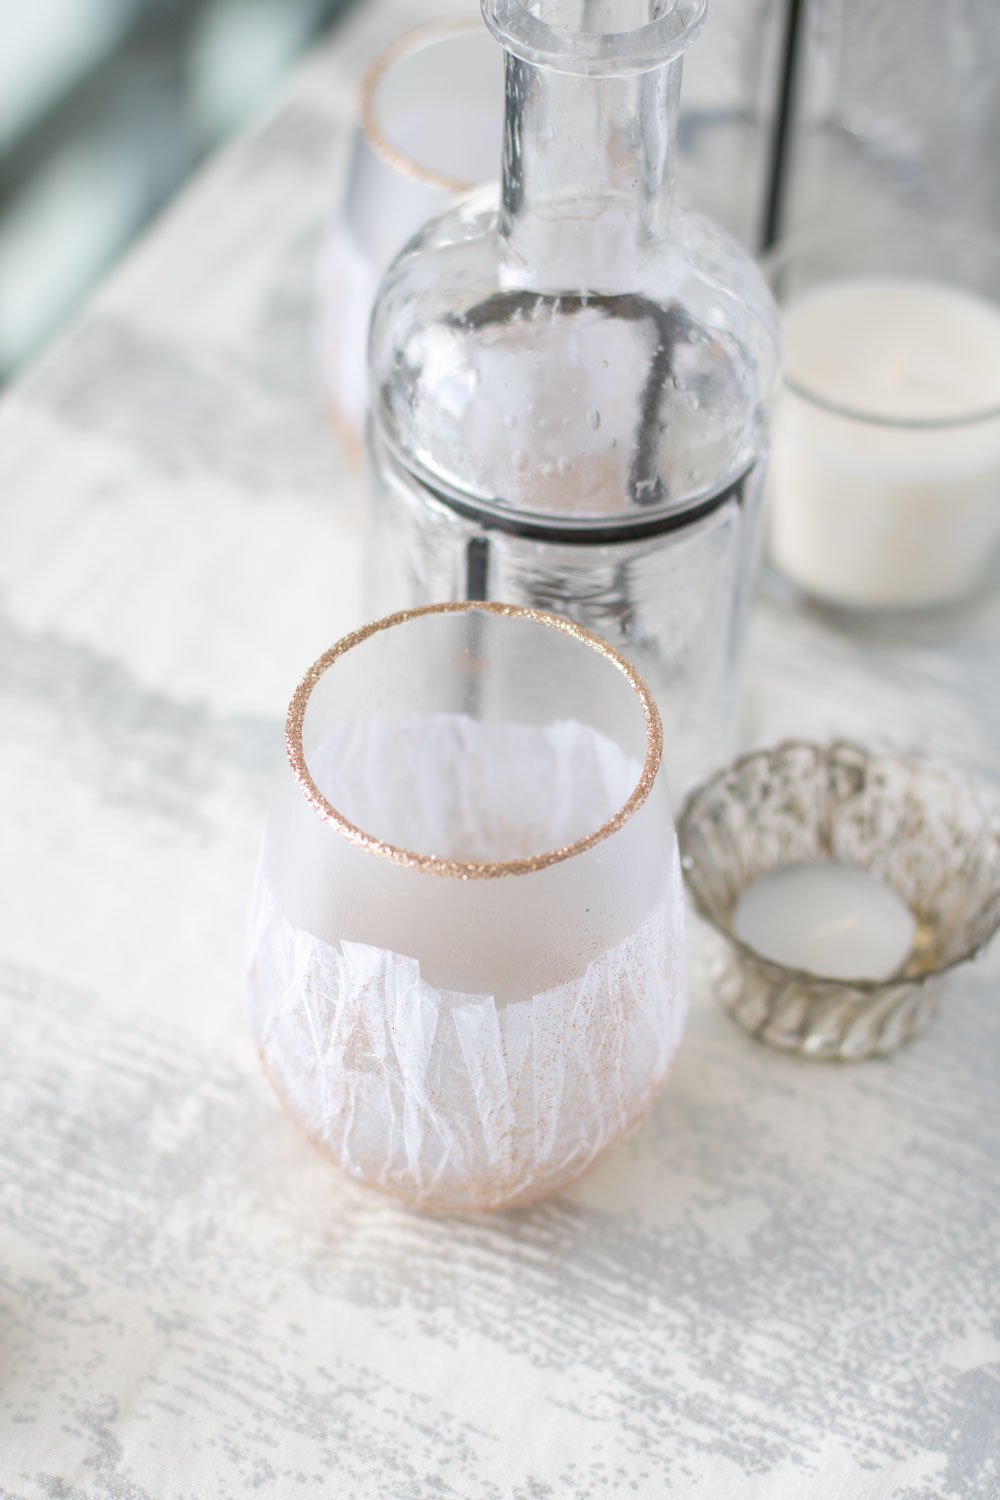
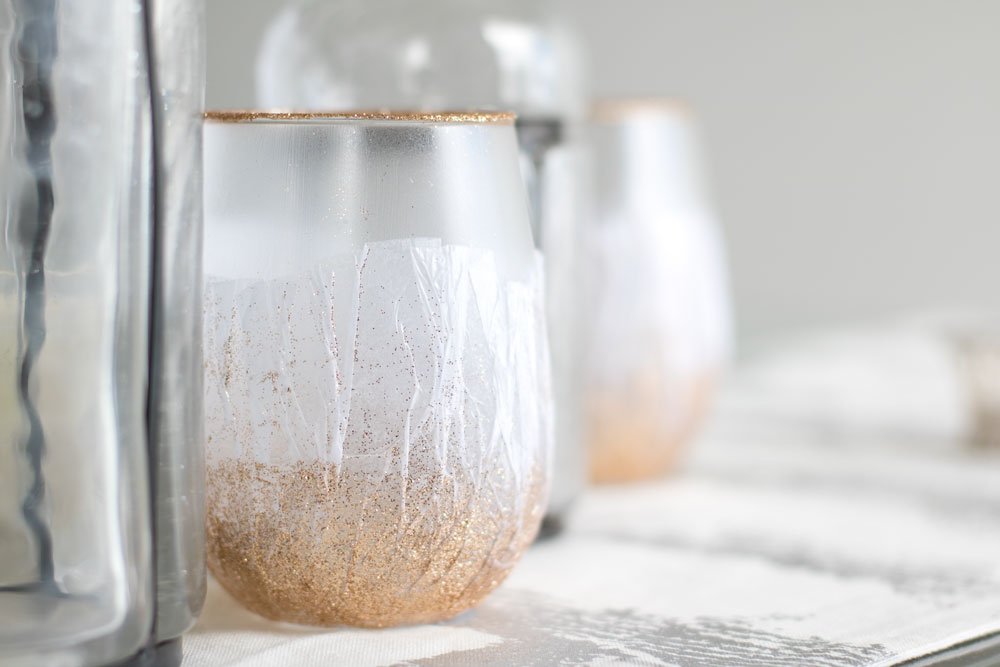
I didn’t cover my entire glasses with tissue paper, so I simply cut circles out of my tissue paper that were the right size. I wanted the paper to come about 2/3 of the way up the glasses. By no means does it have to be perfect! You can used ripped pieces, large squares, strips, or anything you can think of for the tissue paper shapes!
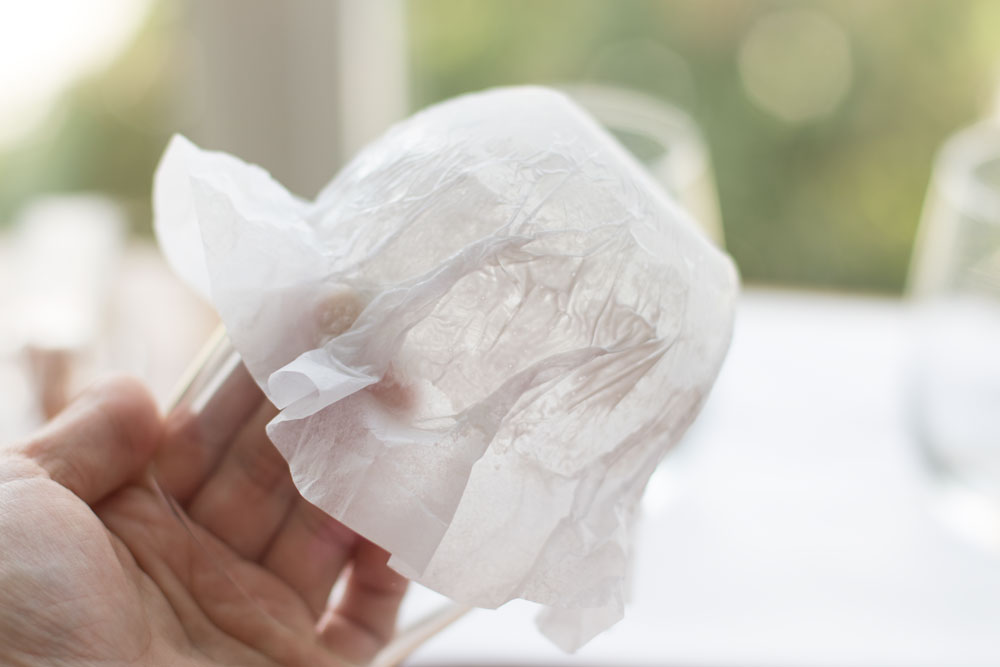
2. Apply Tissue Paper with Mod Podge
Grab your first glass and use your sponge brush to apply Mod Podge onto a small section. I worked in small sections as the Mod Podge dries pretty quickly. From there, glue the tissue paper onto the Mod Podge, and use a mix of your hands and the sponge to flatten the tissue paper over the glass. Don’t go overboard with the Mod Podge, or things will get messy quick. You don’t need to slather on crazy amounts. Work in small sections until you’ve glued the tissue paper to the glass.
If you want to add more layers in different colours, go for it! When you’re done, flip your glass upside down so that it can dry a little. It doesn’t have to be 100% dry before the next step, but it’ll be easier to handle your glass if it’s not completely wet with Mod Podge.
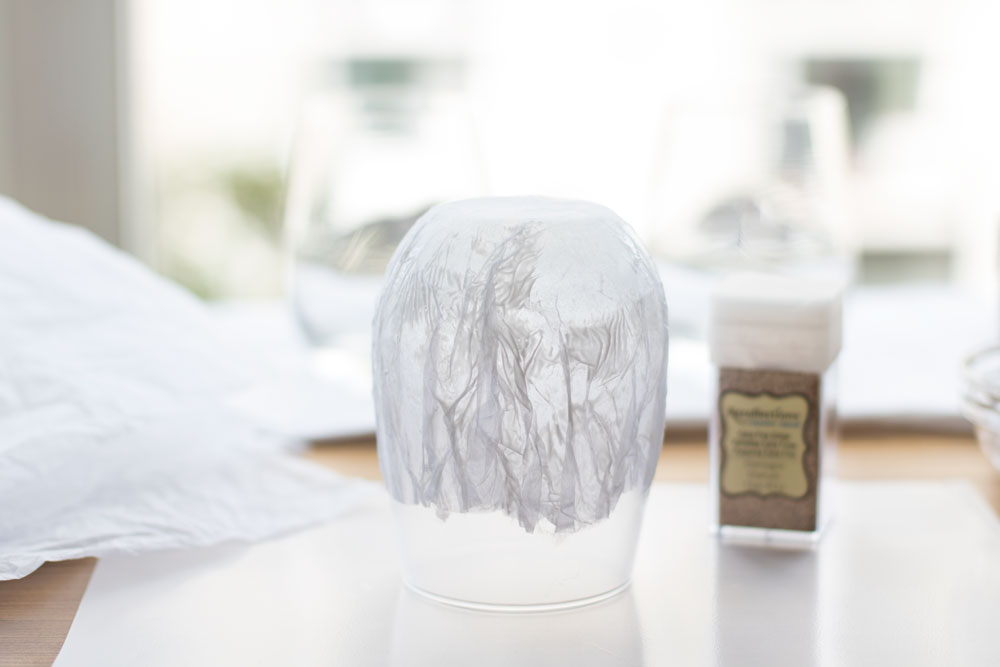
3. Add Glitter
Using your sponge brush, apply the Mod Podge wherever you would like to add glitter. I sponged the bottom of my glass, and sprinkled the glitter to get an “ombre-style” effect. After that dried a bit, I laid a circle of Mod Podge on a piece of plastic, dipped the rim of my glass in it, and then dipped it into glitter. Again, you can do anything you’d like here! I’ve used various types of glitter glue before, sequins, etc. Just don’t use anything too large like beads as they won’t stick well to your candle holder and will most likely fall off. As usual, have fun with this! I mean you can’t go wrong with glitter! ????
4. Spray Sealant
Once your candle holders are completely dry, use a spray Mod Podge or sealant to cover them entirely. This helps the glitter stay on more than anything – although I wouldn’t say it’s a perfect solution – a little glitter may escape! Follow the instructions on your spray can, and I would recommend doing it outside for sure.
4. Let Dry and Enjoy your Candle Holders!
Leave your candle holders to dry, and there you go! You have yourself a few beautiful additions to your home decor! I put tea lights in mine and have them on my dining room table at the moment. But you can put yours on bookshelves, coffee tables, nightstands – really any surface in your house that needs a little decorating!
Happy crafting! Hope you have loads of fun making your own DIY candle holders! ???? And be sure to share your creations over on Instagram and tag me (@danielle.a.connor), I’d love to see them! Do you have any crafts that you loved doing as a kid? Let me know in the comments below!
XO
Danielle